Pages

Saturday, October 29, 2011

Friday, October 28, 2011

HALLOWEEN DESSERTS

I spent my Friday evening preparing for a pumpkin carving party that I am hosting tomorrow night.  I always make cupcakes {I LOVE cupcakes!}, but I thought I would also try to make a couple more desserts.  I am NOT a cook or baker, this is evidence:
That cake is so sad!  I attempted to make a cake for my daughter's 14th birthday last year.  That is officially the last cake I made!
Cooking shows always get my hopes up, then they come crashing down immensely when I attempt to bake!  I went the easy way tonight:  Fancified {that is now a word!} Rice Crispy Treats
Little Debbie Marshmallow Treats, Hershey's semi-sweet chocolate chips, Almond Bark and some jimmies with bats.
I was slightly alarmed at how yellow the Little Debbie marshmallow treats are, I guess I was expecting them to look like the Kellog's Rice Crispy Treats.  Weird.
I melted the chocolate chips in the microwave, drizzled it over the bars and then sprinkled on the jimmies.
Then I melted the almond bark and drizzled it over the bars and added even more jimmies.

I cut them up into three bite sized pieces per bar and will serve them in cupcake liners with cupcake toppers.  The toppers came with some baking cups that I bought at Walmart.  I used those baking cups to make garland :)

Next dessert: Pumpkin Cheesecake in a Jar.  What I used:
I bought two packages of the Great Value {Walmart brand} No-Bake Cheesecake, a large can of pumpkin pie mix and Graham Cracker Crumbs.  I didn't have any graham crackers on hand and we don't normally eat them, so it was cheaper to buy the crumbs.  I didn't use the whole can of pumpkin, more like 3/4.  Mixed the cheesecake according to directions {just added my pie mix} and the crumbs, but added more than just what came with the box mix.
I think the mix looks so creamy and yummy!

I put the crumbs in the jar and used my tart thingy {from Pampered Chef YEARS ago} to push the crust up the sides.
I added the cheesecake mix and sprinkled just a few jimmies on top.
Ta-da!  Simple, easy and fast.  Now I will pray that  the pumpkin cheesecake taste good!  Even I don't think I could screw up the Fancified Rice Crispy Treats!

Have a great weekend!

Linking up here:
Be Different...Act Normal
Funky Junk Interiors
Young and Crafty


Thursday, October 27, 2011

INSPIRED BY...


Funky Junk Interiors
Donna of Funky Junk Interiors.  I had plans to use my three hours of free time while this guy
At the pumpkin patch with his preschool class
was at preschool today to finish up gift bags for Saturday's carving party, but instead while browsing Facebook, I saw a post by Donna and went to check it out.  It was her home tour which I have browsed a million times.  Seriously.  Funky Junk Interiors was the first craft/DIY/inspiring blog that I have ever read.  I don't even remember how I found it.  I have a girl crush on her.  I mean, the woman is a single parent that isn't afraid to drive an RV and go camping by themselves....in the woods....in secluded areas.  Plus, she's just so cool and if I ever go through Canada again, I'm going to stalk her.  Donna, you have been warned :)

I had a random piece of ....not furniture...not a ladder...a part of a piece of furniture?  Anyway, I got it when I bought that huge "as is" parts bundle from Ikea for $10.  It kinda looks like a ladder, so I did this {And no, I only roughed it up a bit with some sandpaper, I didn't paint it, it was already finished}


Really cool....not as cool and pretty as Donna's, but I do love it.  It's going in my craft room to hold my latest magazines {I have a feeling my hubby isn't going to want the huge stack on HIS nightstand to stay there when he returns}.  I'm going to use it right here until after Halloween/Thanksgiving:


It is on one side of the entry table and the shutter's matching sister is on the other {got them both for a total of eight bucks from the ReStore in Tampa, I was psyched!}


By the way, check out Funky Junk Interiors.  Donna is doing a 31 Days Blog to Biz series and she has some seriously important, awesome advice on how to grow your blog and start a business.  She also is very inspiring!  She first inspired me to blog and now these two people are my biggest cheerleaders and encourage me every step of the way:
My hubby: Cameron, The Camster, Cambo, Partner-in-Crime *sigh*  I love and miss him*

My best friend: Kelly, KeeWee, Cowgirl, The Only Girl {not related to me}Who Has My Heart Forever, The Girl Who HAS To Be My Bestie Because She Knows EVERYTHING About Me :)

Who has inspired YOU lately??
 
This project was posted on:


Wednesday, October 26, 2011

ANYTHING LESS THAN THE BEST IS A FELONY...

...Love it or leave it, you better gain way....{Now you'll be singing that song all day, or at least have it stuck in your head, hee hee}.  I have no idea why Vanilla Ice is in my head this morning, but that line in the song had some meaning today.  I had  another craft fail.  I wanted to make a sweet sign for the hubby, he has been in a little bit of a funk {we lost Bosco to cancer last week}.  So, I was trying to make two signs using the die cut letters like I did HERE, one for us to keep and one to sell {hopefully}; however...FAIL.  I was trying to quote my hubby and I's "song," Everything I Do by Bryan Adams {Hello! Robin Hood: Prince of Thieves}, but I forgot one crucial word:
Yeah...um, IT.  I knew I wanted a warm wood color either in the letters or the board, love that look, the rustic with a crisp white.  I can probably still sell this because it does make sense, just not the correct verse for us :)  I also learned that if you use a stain over spray paint, the spray paint comes off and gets all mixed with the stain {at least mine did}.  

So, I thought, okay, I'll use two boards from a pallet and still use the spray painted die cut letters.  That didn't work either, the letters were too big for my pallet boards and I really wanted to use the boards because, hello, they were awesomely junky and aged.  I ended up free-handing the letters.  Here it is:


Love this board and the details

Rusty nails! 


 It's going to live here for now until the lanai is cleaned next week and then it will live outside where it can get an even more weathered look.  Back to the deep, meaningful words of Vanilla Ice....something I didn't love gave way to something I really love and free-handing the letters turned out better than using the die cut letters...there was a problem, and YO! I solved it!  Sorry, I know, I'm LAME :)  Have an awesome Wednesday! 

I'll be linking up here:
Be Different...Act Normal
Young and Crafty
Funky Junk Interiors
Tatertots and jello
Junkin' Junky
Remodelaholic
2805
At The Picket Fence
Common Ground
Stuff and Nonsense
Thrifty Decorating
Saved By Love Creations
House of Hepworths
Fabulously Flawed
The Shabby Creek Cottage
Yesterday on Tuesday
Somewhat Simple
A Little Tipsy 


Wednesday, October 19, 2011

MY PROJECT AND A FEATURE

My Five Minute Halloween Wreath was FEATURED at Fun Family Crafts!  Thank you Amanda!

I have been working on special birthday decorations for my etsy shop, Libby Six Productions.  I am so excited!  I would love to eventually get into party planning, it's been a dream of mine for a while.  Everyone knows that I LOVE a good party!  I tend to go overboard on my own...well, just a teeny-tiny bit.  This is my latest:
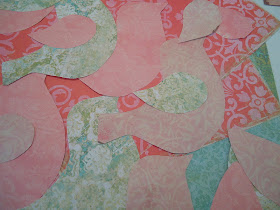
I picked out some beautiful paper that I bought back in September and had used for another project.  I printed out two different bird templates from Google Images.

I try to fit on as many as a can so that I don't waste any paper.  Does anyone else save all the paper scraps "just in case?"  I do.....it's a sickness really.

Have I said that I love this paper?  I do!

Then I tore out some pages from a book that I bought at Dollar Tree for yet another project, this Craft Fail and I used watered down brown paint to age the edges.

And this the finished banner.  I used book pages, scrapbook paper, tulle and ribbons.  I like to make my banners so that they are adjustable.  However, my birdie garland below is not adjustable.

Aaww, pretty, little birdies....aren't they adorable?

The Happy Birthday banners and two birdie garlands.  The garlands are made with crumpled book pages, tulle, and ribbon.

These are my cupcake wrappers.  I used a coordinating cardstock base and added the pretty scrapbook paper over it.

Cupcake wrappers, cake bunting (made with scrapbook paper, ribbon and book pages) and simple cupcake toppers.

The matching gift bags and sign.

And finally, the food label tents.  I was inspired by this bird garland.


Pottery Barn
I used everything that I had on hand...for example, I wish I would have had more white ribbon, but *sigh* I didn't, so I used brown.  I think it still came out lovely as the brown picks up the aged book edges and some of the aging on the scrapbook paper.  I think this set would be perfect for a little girl's birthday tea party!  I have so many other ideas to go along with this, but, well, I'm sure whoever buys this would not like me hovering :)  Thanks for visiting!

The DIT Home Sweet Home Project
I Heart Naptime
Be Different...Act Normal
Funky Junk Interiors
Young and Crafty
Remodelaholic
Blissful and Domestic
French Country Cottage
2805
At The Picket Fence
Stuff and Nonsense
Common Ground
A Glimpse Inside
Fireflies and Jellybeans
House of Hepworths